When submitting artwork for printing, exporting your design as a high-quality PDF ensures the best possible results. Follow these steps to save your file correctly from Canva.
Step-by-Step Instructions
-
Open your design in Canva
Make sure your layout is final and sized correctly for printing. -
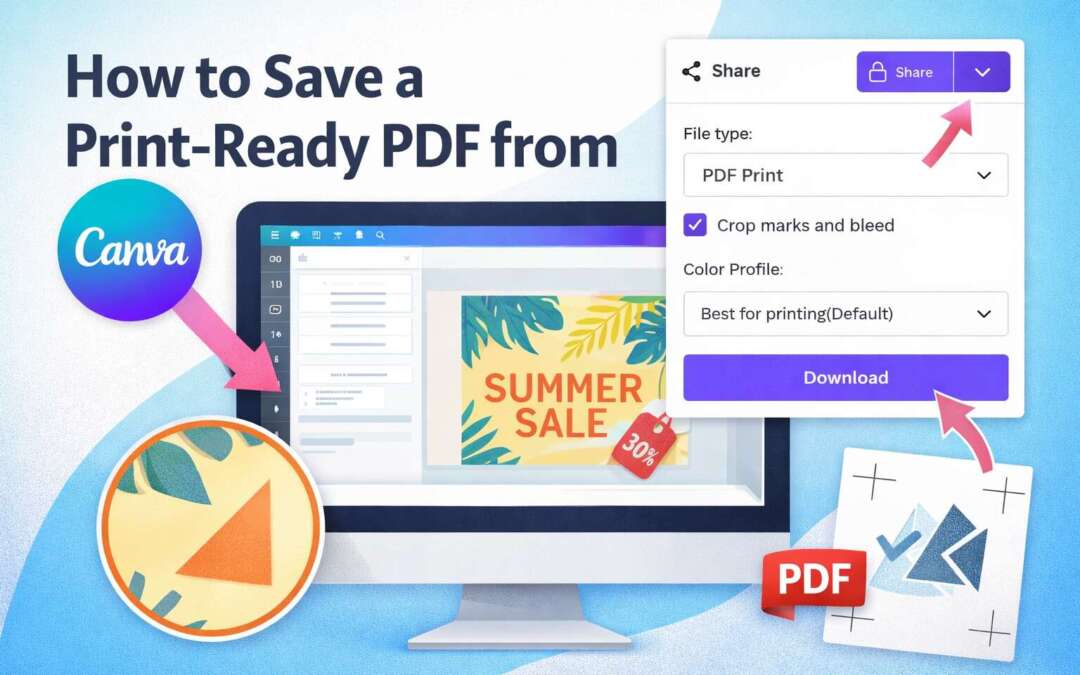
Click “File -> Download” or click the “Share” button, then click “Download”
Either way will take you to the next screen you’ll need. -
Choose File Type: PDF Print
This option preserves image quality and keeps text sharp for printing. -
Turn on crop marks and bleed
Enable Crop marks & bleed if your design extends to the edge of the page. - Select “Flatten PDF”
This will flatten any transparency you have used in your file – doing it now lets you make adjustments to your design if anything looks out of place when output to PDF. -
Check color settings
If you have paid for a subscription to Canva, select “CMYK” for best results. Otherwise select “RGB” – don’t worry, RGB still gives great results for the majority of projects. -
Click “Download”
Your print-ready PDF will save to your computer. - Check the output
Make sure the PDF looks as expected. Are the colors accurate? Did the flattener cause any unwanted changes? Are your crop marks and bleeds on the file?
Helpful Tips for Best Print Results
-
Use high-resolution images (300 dpi) whenever possible
-
Keep all text at least .125″ inch from all edges
-
Avoid exporting as JPG or PNG for print projects
-
If your design includes logos or illustrations, keeping them in vector form inside the PDF helps maintain crisp edges